Thursday, November 8, 2012
One of the top trends of 2012 in new home construction was the addition of multigenerational living spaces, according to the National Association of Home Builders. When building a home meant to house more than one generation, there needs to be a different design than for a traditional single-family home. Whether it's because more are children returning home after college or more parents are moving in with the family, multigenerational homes are increasing in popularity.
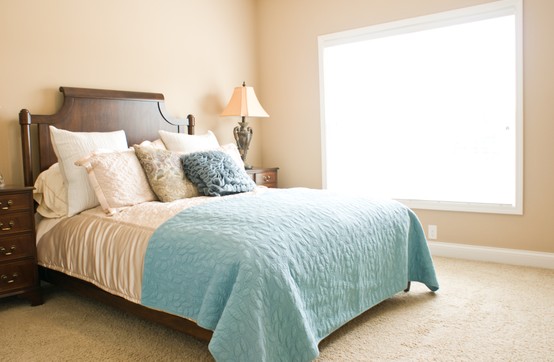
We at Ball Homes keep ahead of the trending designs and have been offering this type of living in many of our most popular floor plans. Many of our floor plans offer a wide variety of options to meet the needs of today’s families. From optional first-floor guest suites to finished basements with full baths, our floor plans are designed around what you, the buyers, want and need from your home.
Friday, November 2, 2012

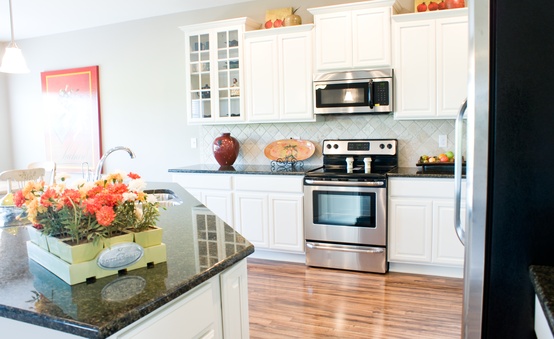
After you’ve moved in to your new Ball home, make sure your kitchen remains organized and clutter-free with these quick tips!
-
Organize your kitchen cabinets by placing items you’ll use the most on the lower shelves and the things you’ll use least on the higher shelves.
-
Store small appliances like a coffee grinder, handheld electric mixer, and toaster, inside a cabinet on a large lazy Susan. You’ll be able to keep the large, bulky items hidden, but still within reach when you need them.
-
Use your new glass-front cabinets to showcase your good china, antique bowls, or even canisters filled with pasta.
-
Create a cooking zone around the stove, storing pots and pans as close to the range as possible. Stow essential tools together within easy reach of your cooking zone for efficient food prep.
-
Utilize your interior cabinet doors. Line a door with cut-to-fit sheets of cork to create a message center, or attach a magnetic board to the inside of a door.
-
Set aside one drawer for junk. Most organization experts agree that you can and should have a junk drawer for all the little odds-and-ends things around the house. Use drawer dividers to keep it organized and make sure you go through it at least once every few months to throw away the things you really don’t use.
Do you have any other kitchen organization tips? Let us know on our Facebook page!
-
Organize your pantry shelves as you would a library, with food items grouped by category. Save space by storing bulky food items in coordinating containers.
-
Line the base of your cabinets with a waterproof mat. You’ll be able to easily wipe up spills, leaks, or crumbs while protecting your cabinets.
Do you have any other kitchen organization tips? Share them with us on our Facebook page!
Monday, October 29, 2012
With Halloween just a few days away, decorate a perfect looking pumpkin with the help of these step-by-step instructions!
1. Pick out a pumpkin.
Examine the rind. It should be firm, uniform in color, and free of cuts, bruises, and blemishes. Make sure that the stem doesn’t look brown and dry. And don’t use the stem as a handle, since even a healthy one can break off. Pick up a pumpkin by its base instead. Give the pumpkin a knock. A thumping sound means the pumpkin is solid, with no internal defects, rot, or soft spots. You should try to have an idea of what you want to do with your pumpkin before you pick it out. If you want to carve an intricate design in your pumpkin, it may be easier to carve on a flatter surfaced pumpkin.
2. Carve your pumpkin.
Make sure you don’t carve your pumpkin too early! Once a pumpkin is cut, they usually last 4-5 days before they start to rot. With a serrated knife, carefully cut an opening around the stem of the pumpkin, leaving a small notch on the back. It will be easier to put the top back on the pumpkin when you’re finished.
3. Scoop out the goop.
Use a large spoon to remove the pulp and scrape the sides clean of stringy pieces. Separate the seeds from the pulp for a tasty treat later. Make sure you don’t put anything down your garbage disposal. It will clog up the drain and be a big hassle!
4. Start drawing.
Use a marker to start drawing a face on your pumpkin. If you aren’t an artist, you can use a free pumpkin stencil like the ones shown here or here.
Monday, September 24, 2012
A cold front has moved into the area, just in time for the beginning of Fall. We’re just two days into the new season and already we’re starting to see the leaves fall and the temperatures drop. Kick off this new season by taking the time now to prepare your home for the cooler temperatures ahead. Taking the time to complete these tasks now will ensure that you and your home will have an easy transition into the coming months.
1. Inspect the roof, gutters and drainpipes. You may want to hold off until later in the fall (when most leaves have dropped) before cleaning the gutters, but doing a visual inspection now is a good idea. If any branches and leaves fell during summer storms, remove them so they don't cause blockages during autumn rains. Inspecting your roof now will leave ample time to have repairs or a replacement made before winter.
2. Have your chimney cleaned before you light the first fire. Check your fireplace for residual soot, blockage, or creosote. Schedule to have a professional come out and clean your fireplace before you strike up a match. If you have a wood-burning fireplace, move your firewood to a covered area for easy access. Make sure you inspect for insects before moving the wood, otherwise you’ll run the risk of bringing them into your home.
3. Tidy up the porch. Falling leaves means lots of yard debris to pick up. Sweep away any dead leaves or branches to create a warm and inviting area to welcome your guests to your home. Add some brightly colored flowers, like mums, to planters by the front stoop, or hang a seasonal wreath on your door.
4. Prepare your doorways with rugs and mud trays for dirty shoes. When the wet weather strikes, make sure your flooring is protected by large rugs and boot trays by entrances. Add a basket or small bins for papers and cold-weather accessories to help keep entrances organized and clutter-free.
5. Clean, repair, and put away all lawn furniture and equipment. Close down and drain all lawn fountains, sprinklers and hoses before the freezing weather hits. Clean and put away all lawn care tools. After the last use of the year, prep your lawn mower for the winter.
Do you have any other tips to prepare your house for colder weather?
Thursday, September 13, 2012
Choosing the right flooring for your Ball Home can be a tough decision. It has a major role in the look, feel, and the ambiance of a room in your home. Flooring materials are more varied than ever and offers both fashion and function. But all the attractive new options may leave you feeling confused about what best suits your needs. Depending on your lifestyle, budget, and the amount of traffic your floor will endure, will dictate the perfect flooring for you. Below are tips and some questions to ask yourself when choosing the right flooring for your home.
Lifestyle: How you and your family live and use your home is the most significant factor in choosing flooring. If your family has heavy traffic, pets, kids, and is very active – plush carpet may not be ideal. Heavy traffic areas should consider resilient flooring, such as ceramic tile, vinyl, or wood flooring. While there are some pre-finished wood floors that have durable top coatings, laminate floors or ceramic tile get the nod here for being the most durable relative to scratches and wear and tear. If your home has minimal traffic, and you enjoy having softness underfoot, carpeting or area rugs over wood flooring may be ideal for your home.

Location in Home: Flooring that is at the entry or foyer of your home should have a “wow” factor, but be durable to outdoor elements. If snow, rain, and mud are a factor in the entry to your home, consider using durable flooring, such as tile or wood. Entry mats outside of the home should be placed to remove the majority of outdoor moisture; this will help keep your floors cleaner too! Flooring in bedrooms, and kid’s rooms should be comfortable for bare feet. Flooring in utility, laundry and bathrooms should be able to resist water. Hardwood and laminate wood flooring in not recommended in areas of high moisture, as warping and damage can occur.
Maintenance and Upkeep: It'd be great if there was such a thing as a zero-maintenance floor, but unfortunately, there isn't. Some level of work will be required to keep any type of floor looking good. If you prefer a mop-and-go approach, vinyl may be a better option in some areas of your home to keep cleaning time to a minimum. It’s easy to do a quick sweep of the vacuum over carpets, but lighter colors show more stains than a darker color does.
Cost: Flooring is priced per square foot and can add up quickly! All flooring materials have ‘grades’ of quality. Synthetic carpet is cheaper than Berber carpet that contains big and small tufts of pile. The plusher or more durable the carpet – naturally the more expensive it will be. When choosing carpet, don’t forget about the carpet pad beneath. The carpet pad will make your steps more comfortable, and will make your carpet last longer. Tile is very low maintenance and doesn’t usually have to be replaced, unless it cracks. Wood and laminate flooring has become more affordable over the years, due to new products entering the flooring market.
The type of flooring you choose for your home depends on a lot of different factors. Doing a little bit of research on the different types of flooring ensures that your floors will stay looking fresh and your home looking new!